Instructions for Painting and Assembling
Beebox poly hives
Painting and assembling, open mesh floor, brace comb, and dummy board


Painting the outside
Paint the box walls before assembly (unless you plan to paint over the yellow plastic strips). Modern Beekeeping recommend gloss paint.
David Evans recommends Hammerite Garage Door Paint. It contains benzene, so avoid inhalation. It reacts with polystyrene (PS), causing a solid bond. Its ecological impact is unknown, but it’s marked “harmful to aquatic life with long-lasting effect.”

Masonry paint
Major manufacturers incorporate a biocide in their paint, so avoid using them.
For example, Dulux comes in 250ml and five-litre pots (£48.37 - price 2022). It warns:
“harmful to aquatic life with long-lasting effects. Contains 1,2-benzisothiazol-3(2H)-one, C(M)IT/MIT(3:1) and 2-octyl-2H-isothiazol-3-one.”

Better choices are Lakeland and Little Green paints that do not wreck our environment. Five litres of Lakeland masonry paint costs 78.20 ex VAT. (2022). It goes a long way.
Painting the inside

Although I paint the inside, it’s unnecessary, but it makes them look nice, may cause the surface to be less hospitable for pathogens, and makes damage easier to spot. Some say the hives are fiddly to paint, but they are no more complicated than a skirting board.
I’ve met a commercial beekeeper who said he didn’t have time to paint his hives, but PS deteriorates in ultraviolet light. It goes yellow and friable.
To prevent them from nibbling the boxes, look after the boxes with extreme care. Gaffer tape or four coats of varnish are good preventative methods. If necessary paint the internal edges, and around the entrance with Hammerite paint. It works because (I assume) it is unpleasant stuff. Therefor, after gentle sanding, seal it with a top coat of gloss paint.
Assembly

Slide the plastic edges into position
The only tricky bit when painting is to avoid getting paint where the yellow runners slide on. But this is not difficult if you use a roller that is not saturated with paint. Some think the yellow runners look garish, but they can be painted (with gloss) after roughening the surface. The yellow fades slightly with age or hot washing. The walls are a tenon mortise fit. Apply glue and push them together with one section flat on the floor. The tenons can break if the sections are joined when holding both of them in the air. Preferably, hold the joints together with long woodworking clamps or a framing band clamp until the glue sets.
If you push the box walls together incorrectly, realise your error and yank them apart, the tenons look okay. They eventually fail. I’ve mended this by glueing and screwing; like this, they should last a long time. A wooden hive with 19 mm thick walls won’t be so easy to repair. If you are absent-minded and assemble the poly hive walls before putting the yellow strips on first, just soften the strips in hot water, and force them into position.

Rather than using a hammer to drive the joints home, sit on the box. I’m not very heavy, so I have to bump up and down. A word of caution: if you bump, push the box up against a wall to stabilise yourself; otherwise, you may topple over, and something might get broken, and it could be you!
-

No glue
Strap the sides together if you choose not to glue the joints permanently. If a box is heavy, it will fall apart. I recommend you just use them as brood boxes.
-

Gluing
-

Joint complete
If required, drive the joints home using a sheet of wood and a mallet.
-

Screwed & glued
Secured with decking screws.
-

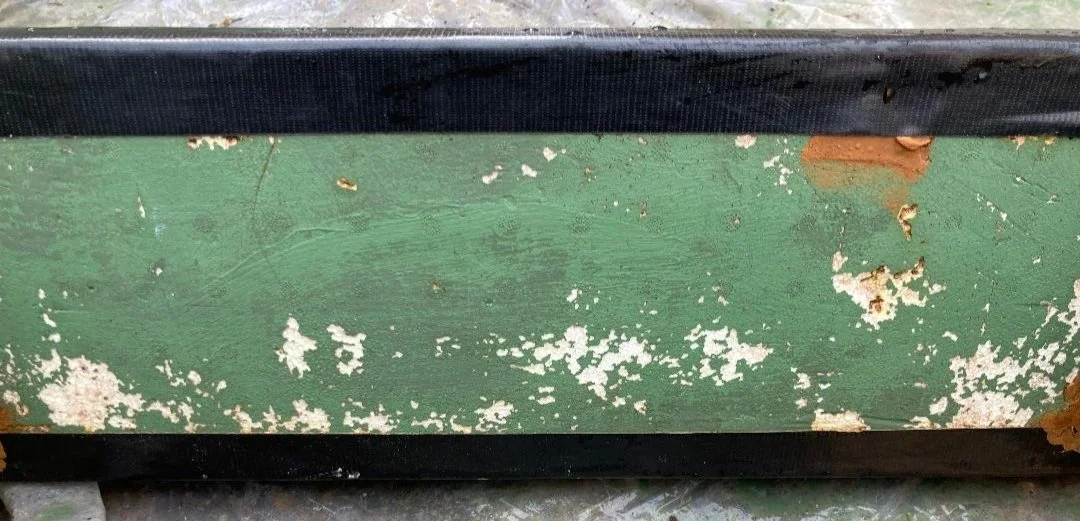
Nibbled
Cracks and edges are often chewed rather than propolised. Nibbling is eliminated by Hammerite paint. It’s unpleasant stuff, so I’m trialling Lakeland gloss paint.
-

Filled
I’ve filled the nibbled area with 2 part wood filler. It just needs rubbing down and painting.
Assembling the Open Mesh Floor (OMF)
The mesh slides under protuberances, but must still be secured by little screws. The screws are best removed for cleaning. But if you leave them in place, thorough scrubbing with hot washing soda results in a reasonable clean.
An OMF that covers all the floor of a hive reduces the varroa burden by up to 20%. Beeboxes may have half this result if mites crawl back to the bees.
You might anticipate the bees would propolise the mesh, but they never do.

Managing Brace Comb
Bees inevitably build unwelcome combs vertically between the top of the frames in the bottom box and those in the one above, which can result from an incorrect bee space. The precise value of bee space varies. Langstroph advocated 12 mm, and we reckon 8 mm. Despite being correct, we still have to tackle brace and burr comb.
Another explanation is that feral bees build their combs in a continuous sheet without a gap in the middle, so bees naturally tend to fill the space.
Unwelcome comb between the frames is less of an issue with top space hives.
Some beekers try to reduce brace comb by wiping the top of the frames with petroleum jelly. This is time-consuming, and I don’t think it helps. Moreover, petroleum jelly contains some carcinogenic substances, as found in charcoal-grilled food and car exhaust. Eventually, the wax gets in the way, and action is necessary. I drive the bees down with water sprays and quickly scrape off the wax. No problem.
I’ve read of a trick with Nationals that may reduce the problem. The boxes are placed in an alternating pattern. The first box has its frames parallel to the entrance (warm way), and the next has frames orientated 90 degrees relative to the entrance (cold way).
Rolling bees - Using a Dummy Board
BeeBox Langstroph and Nationals have ten frames in each box (wooden Nationals have 11), but they all have a space for a “dummy board”. It sounds stupid and uninteresting, but it is quite a good idea. The board lives at the end of a box beside the wall. The surrounding space is a bee space (6–8 mm), so the bees are happy. The board's role is to reduce the risk of “rolling the bees”. A dummy board is unnecessary when using plastic frames. I explain this in Inspections.
Assembling the hive YouTube presentation by @Devonbeekeeper

Half-hearted brace comb
Swarm Trap
The only assembly required is to screw the screened floor mesh (OMF) or queen excluder in place.
Page H2