
Processing honey
From honeycomb to honey jar


Clearing Processing Forms Wax
Basic Assessment: Describe the process of extracting honey from combs and a method of straining and bottling honey suitable for the small-scale beekeeper, including hygiene.
Contents
Nectar & sugar
Harvesting: using a clearer or fume board
Extraction: crushing or uncapping & spinning
Processing: warming, sieving, making soft set honey
Bottling & clearing the wet combs
Nectar and sugar
The mix of sugars in honey depends on the flowers, weather, and other conditions. As soon as a forager holds nectar in her honey stomach, an enzyme called invertase splits some sucrose into fructose and glucose. The proportions of these and other sugars vary from flower to flower in these ranges: fructose 27: 44%, glucose 21: 31%, sucrose 0.1: 17% Maltose 0.1: 17% etc. The nectar is further processed in the comb and once its sugar content is reduced to 18-20% it’s called honey! The practical implication of honey variability for honey processors is that honeys can be mixed to achieve the desired qualities. By combining high-glucose Oil Seed Rape (OSR) honey with a “standard” floral honey, the glucose level can be reduced, so the time before crystallisation increases.
A poor harvest happens more often than people like to admit. If you suffer disappointment, work out what went wrong and what you will do differently next year. Formulate a plan and start implementing this as you prepare for winter. I recommend you start out using wax rather than plastic foundation.
Harvest

After the main nectar flow ends and you open a hive for more than a moment robbing is inevitable.
Harvesting involves removing the bees from the frames (clearing), slicing off the caps on the honey comb (uncapping) and spinning the frames so that the honey comes out under centrifugal force (extracting). Harvesting generally takes place after the main nectar flow. In Southern England this was historically in early August, but in 2025 it was mid-July.
Consider breaking down brace comb the day before removing the frames. Perhaps organise the frames so that the ones to be harvested are in the boxes at the top of the hive. You can estimate the size of your crop. For example, a plastic medium frame of honey weighs yields about 2.1 Kg (each frame weighs 2.7 Kg, of which the frame and comb weigh 400 gm. It is impossible to extract all the honey).
Basic Assessment: Describe a method to clear bees from the supers.
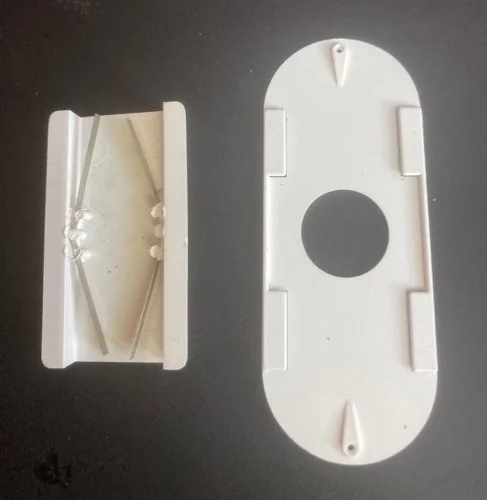
Clearer Boards
Drones may block the mechanism. The devices come in various designs, and some work better than others. Porter Bee Escapes are slow and take more than one day. In contrast, in fine weather, Rhombus and Canadian devices take 4–7 hours and are less likely to block.
If you’ve not used a QE, you face the nightmare of knowing which box contains the queen (Q), which is nearly impossible to work out when there is a high risk of robbing.
Before processing, the bees need to be removed from the supers. This is usually achieved using a clearer board with a one-way valve. But if you only have a few frames, you can remove the bees with a brush.
The white, clearer devices on the green board face downwards, and the eke ensures the bees have somewhere to hang out. The problem with clearer boards is that if left too long (more than 24 hours or so), the bees find their way back and steal your honey.

A board designed by David Evans that uses a rhomboid device.

Porter bee escape. They contain two springs that have to be adjusted just so. They fail easily. One lost drone suffices.


Curtain bee escape
Fume board
The inner surface is impregnated with a substance that evaporates and repels bees.
There is a black metallic top and an inner surface covered with felt. On a hot, sunny day, the metal heats up, causing the bee-repellant to evaporate off the felt. If you choose a heat-resistant paint, you can blast it with a plumber’s torch (but it is difficult to heat it sufficiently).


A fume board only works in hot, sunny weather.
The bee-repellent Beequick smells lovely, like marzipan, but bees hate it. To use, spray the felt and puff smoke over the top of the frames, so the bees know which direction to go. Then, put the fume board on top of the hive. The bees rattle down (if the felt is hot enough). This is an excellent method if you do not know the whereabouts of the Q. It is not so good at clearing brood boxes as the nurse bees hang on tight.
Every frame that contains unsealed stores must be checked. If it contains too much water, it may cause the honey to ferment. Shake the frame over the hive; if nectar spits out, it is not ripe.
Honey processing
A few days or so before the big day, prepare by placing the honey laden frames in the boxes at the top of the hive. Alternatively, get up early, temporarily block the hive entrances, and select the frames you want.
The extraction room must be spotlessly clean with washable surfaces. Use separate hand and instrument sinks.
Note wax forms “fatty” streaks in hot water.
Preferably, a toilet must not lead off the extraction room. Failing this, don’t use the bathroom before or during extraction. Always replace the lid before flushing to reduce a toilet plume. This invisible mist can deposit all sorts of bugs on surfaces, for example, Salmonella. Whether there are enough to constitute an infectious dose, I don’t know, however, mixing honey with miniscule amounts of pooh isn’t great.
Best wear a hair net, long sleeved shirt, apron, nitrile gloves, everything needed to ensure hair or dirt won’t hop into the jars. A plastic apron flaps around and could get stuck in the extractor. Reusable overshoes are easy to clean.
Honey processing
Uncap —remove the wax caps that cover the honey in the cells
Extract honey from the combs by crushing or whizzing them around in a circle so that the honey is flung out due to centrifugal force.
Coarse sieve.
Leave it to stand for 24 hours in settling tanks so that crud and bubbles rise to the surface.
Warm and fine filter
Bottle
Label
Before you start extracting, make sure the room is bee-proof!
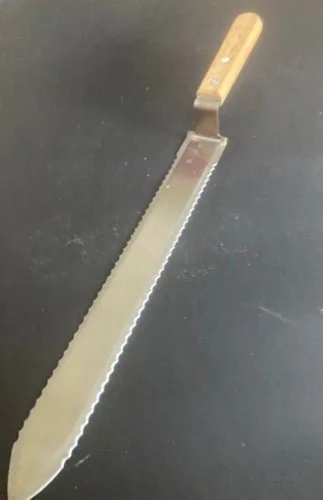
Uncapping

The best knifes are twice the width of a super. Run it just under the surface of the comb. You might like to warm it every few cuts in hot water, but dry it thoroughly. A thermostatic expensive heated knife looks blissful.
If the surface of the comb does not extend beyond the frame edges, a knife is no good. You could use a fork instead.
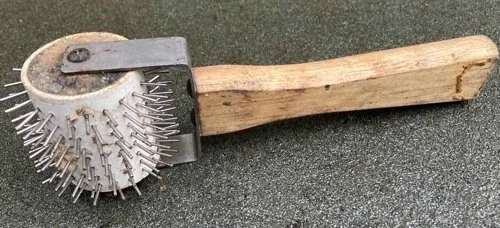

A hedgehog roller is quick and easy, it has been my favourite method, but it fouls up comb, especially warm comb. The copious gunk and cappings block sieves. People report that one with smaller spikes works well.
A purpose-made knife has a raised handle, which reduces your contact with the honey. Use it as if you are cutting bread.
To help with uncapping, you could use a greenhouse gravel tray with or without a colander. I use a GBPro box. Alternatively, buy an uncapping tray.
A heat gun destroys cappings in dry frames (when there is air under the cappings and the surface looks pale). Heating honey is only a problem if you are far too enthusiastic even before the honey bubbles. Old honey in dark frames is impossible to remove with any method.
Extracting - removing the honey from the comb
Crushing the comb

Sieving a small honey crop through muslin held in place from the legs of a stool.
Easy. Mash it up and sieve.
If you destroy combs, you will have fewer drawn frames next year. Drawn comb is so helpful, and I struggled until I had some, but many people are okay without.
Using a Honey Extractor
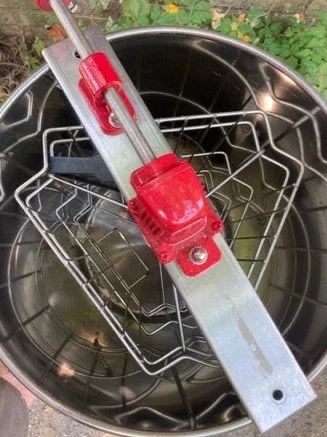
An extractor (spinner) is a metal or food-grade plastic cylinder mounted vertically, usually on circa 18 inch legs, closed at the lower end, with a large tap (Honey gate). The extractor is open at the top end. Inside, the frames are held vertically in metal mesh baskets attached to an axle that can be rotated by hand or motor.
Top view of a tangential extractor.

This extractor has a tank below the spinner. There is a coarse filter between them.
There are two sorts of extractors. Easy ones are called radial (the name indicates the orientation of the frames). Tangential ones are fussier, as you have to turn the combs over halfway through (3 turns is best). Tangential spinners extract more honey but cannot be used with unwired frames. Some extractors can accommodate small frames in a radial position, while larger ones must be extracted tangentially. “Small” usually means National supers. If you use Manley frames, check that they fit. It is easy to wash an extractor with a pressure washer. Avoid using hot water.
With a manual spinner, start slow and build up. Keep going until honey stops sloshing onto the sides of the drum like candy floss. At speed, an electric-powered extractor can wobble across the room, especially if it is not evenly loaded. There are three approaches to fix this: Bolt it to the floor, employ someone to hang onto it for dear life, or put it on casters. If you fix the extractor to a chunky T-shaped wooden frame with casters at each end, it will find its balance and do a sedate waltz.
Processing: filtering, bottling, cleaning the wet combs
Filtering

To filter honey, it needs to be warm. Options include: snatching the honey combs off the hive and processing it immediately. This risks the soft comb collapsing. Better let it cool and then extract the honey.
Once you have the honey in buckets, leave it for 24–48 hours so contaminants and bubbles rise to the surface. Then lay pieces of kitchen towel or a sheet of cling film on top and peel it off to remove the scum.
To fine filter, heat it to 40 °C, preferably 50 ºC in a warming cupboard. A shed, or conservatory on a sweltering hot day may suffice. Honey at less than 40 ºC is much too viscous to pass through a fine sieve like the nylon cloth sold by bee stuff stores. By removing particulates, crystallisation will be delayed.
Many do less intense sieving, using a conical hang off the honey gate strainer, and call it unprocessed honey. Others use better filters such as a single layer of muslin, net curtain, women’s stockings, cheese cloth etc. That is all that is necessary to make unpasteurised, unheated, or cold-filtered honey.
To remove sugar crystals, heating to 50 ºC is effective. This temperature must be maintained for more than 36 hours.
Bottling
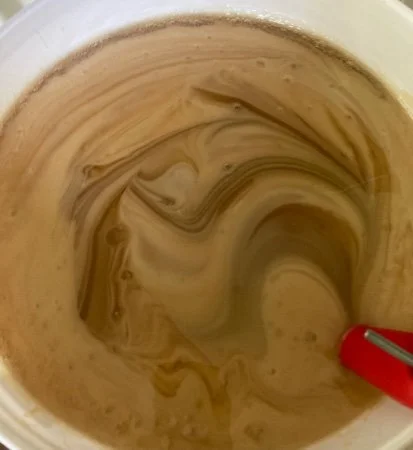
Bubbles, pollen, and other extraneous objects in the honey can act as foci for crystallisation. Occasionally, honey refuses to become clear. An experienced beekeeper told me this cloudiness may be due to a high glucose level or dehydration. Perhaps pollen or a high water content could be responsible. Cleaning jars in a dishwasher works great. Some sterilise them in their oven. When bottling, the jars should be warm. Some say using your oven at its lowest setting is perfect, Perhaps it is for hot honey
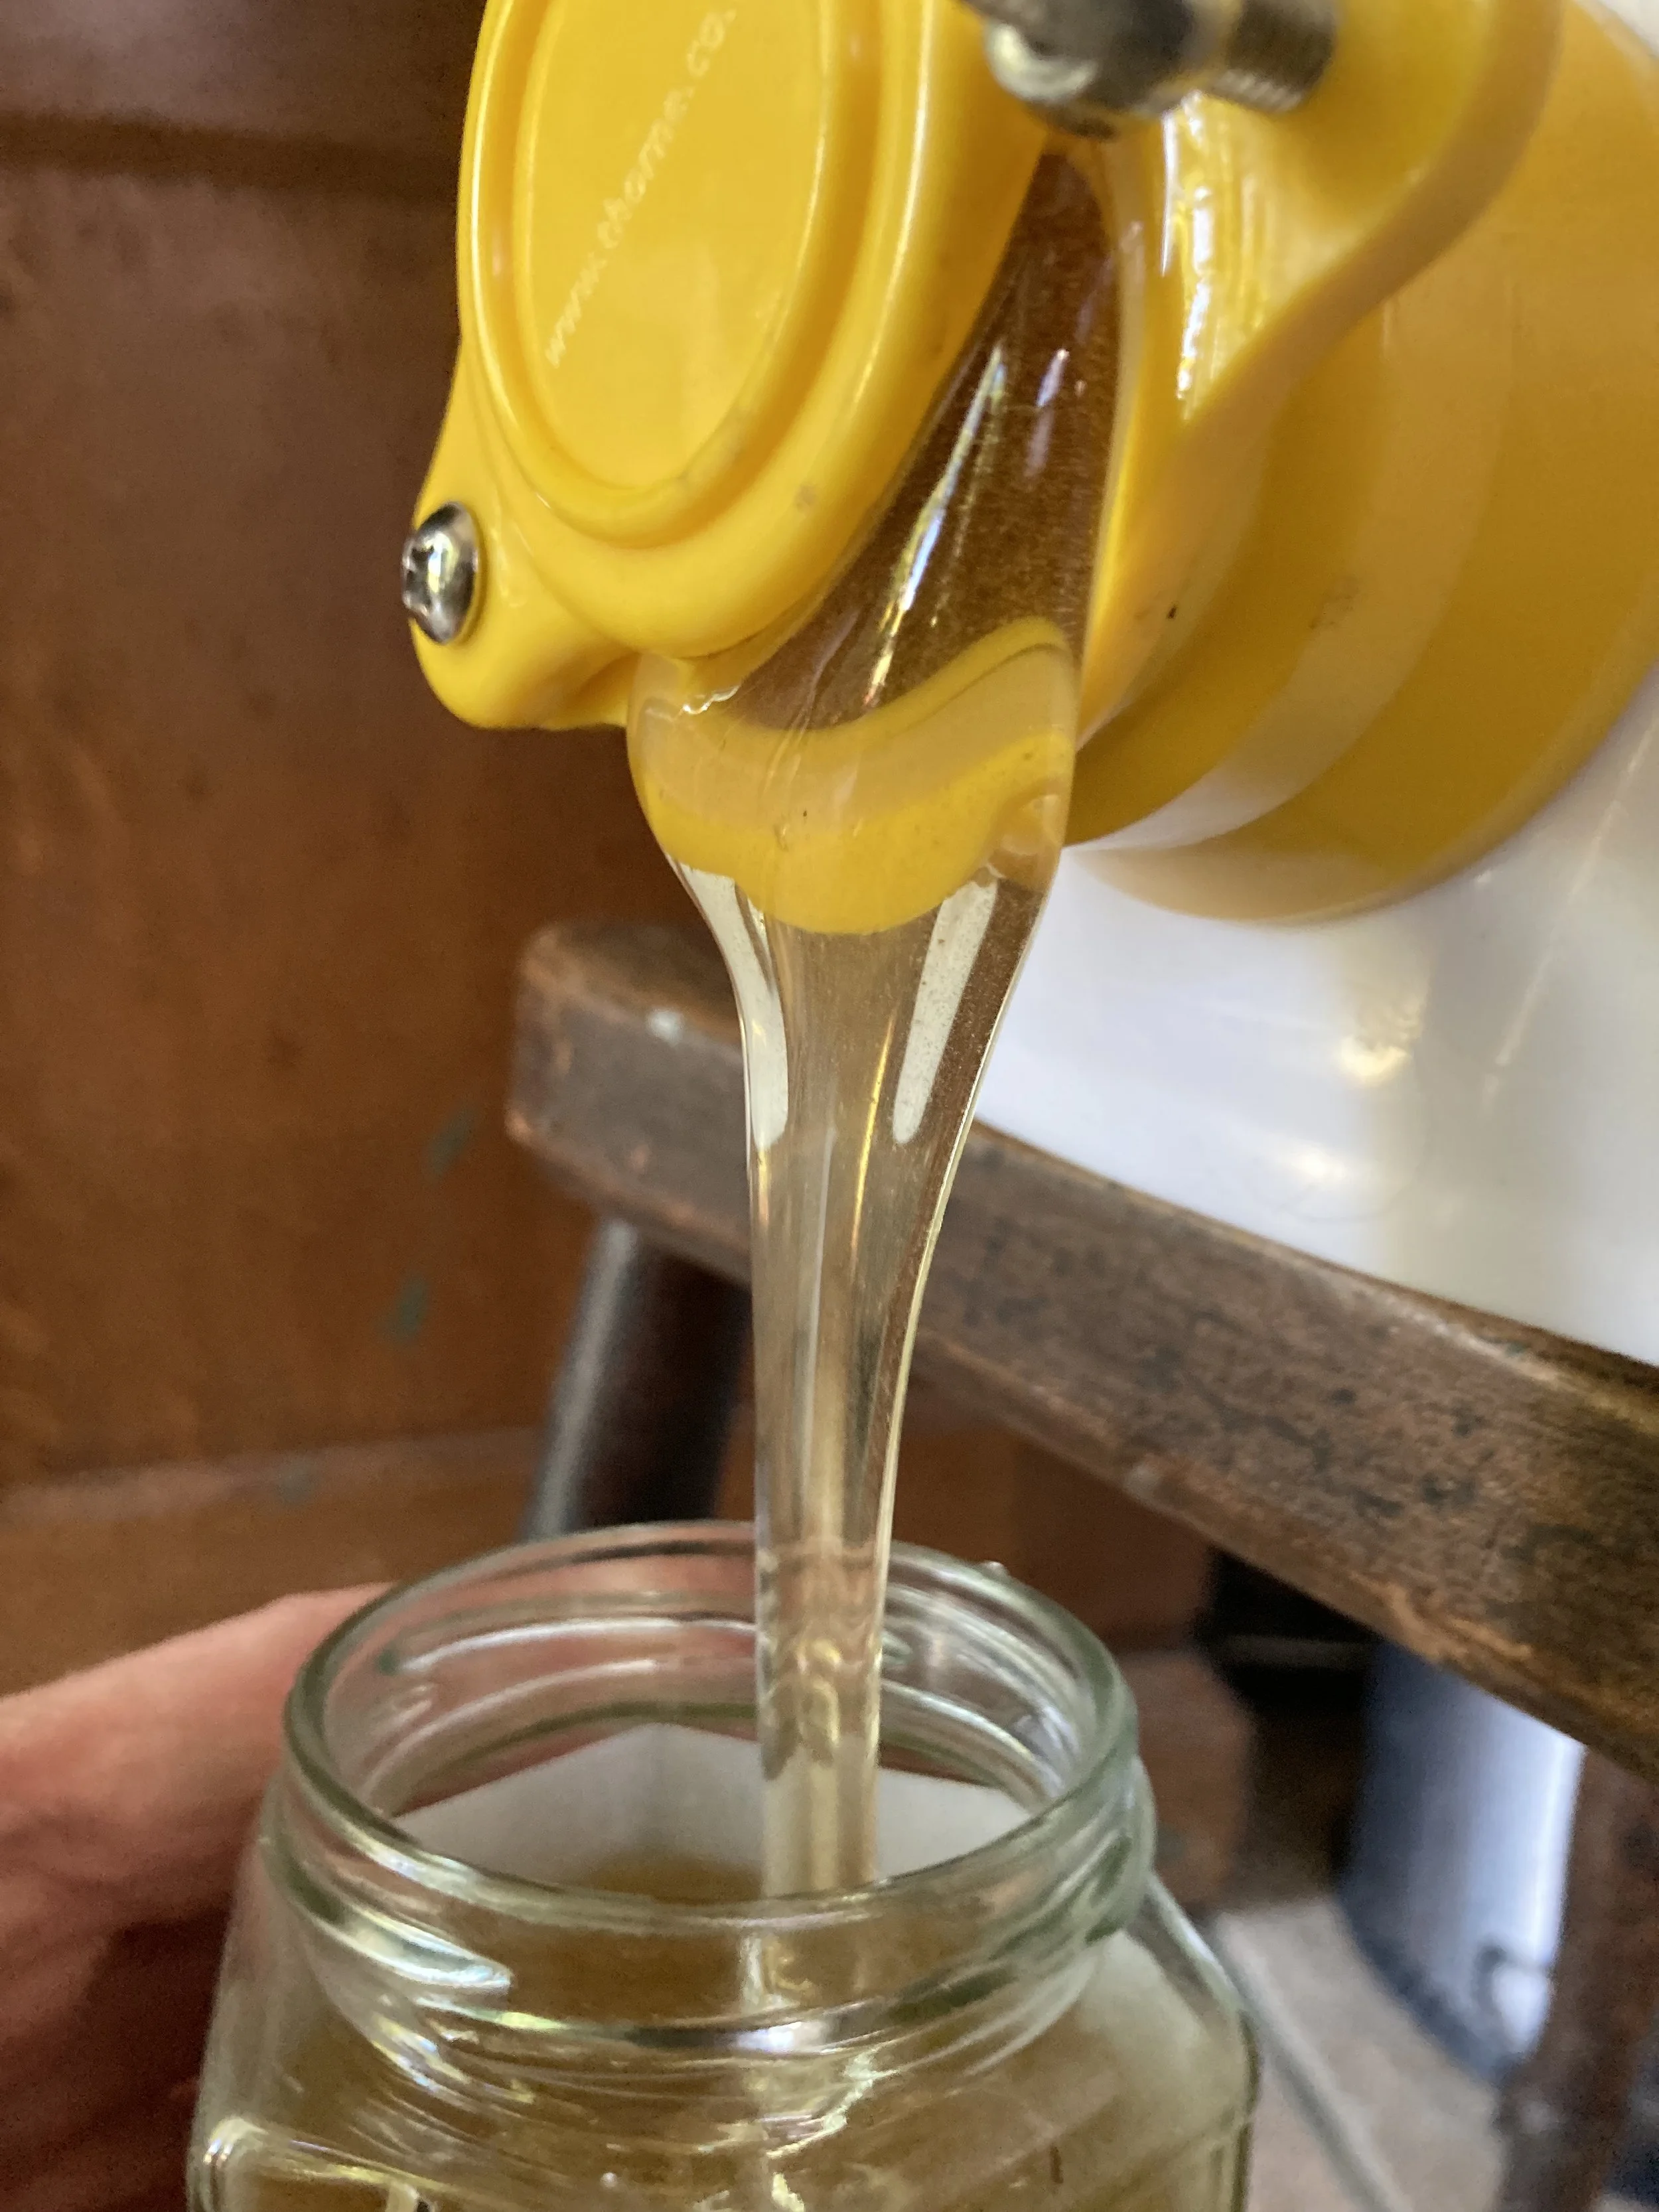
Check how full the jars must be to attain the correct weight. If you look under the screw top and see no light percolating through from the other side, you can be sure that the weight is adequate. Honey in hexagonal jars forms bubbles in the corners. These need poking out with something long, curved and pointy.

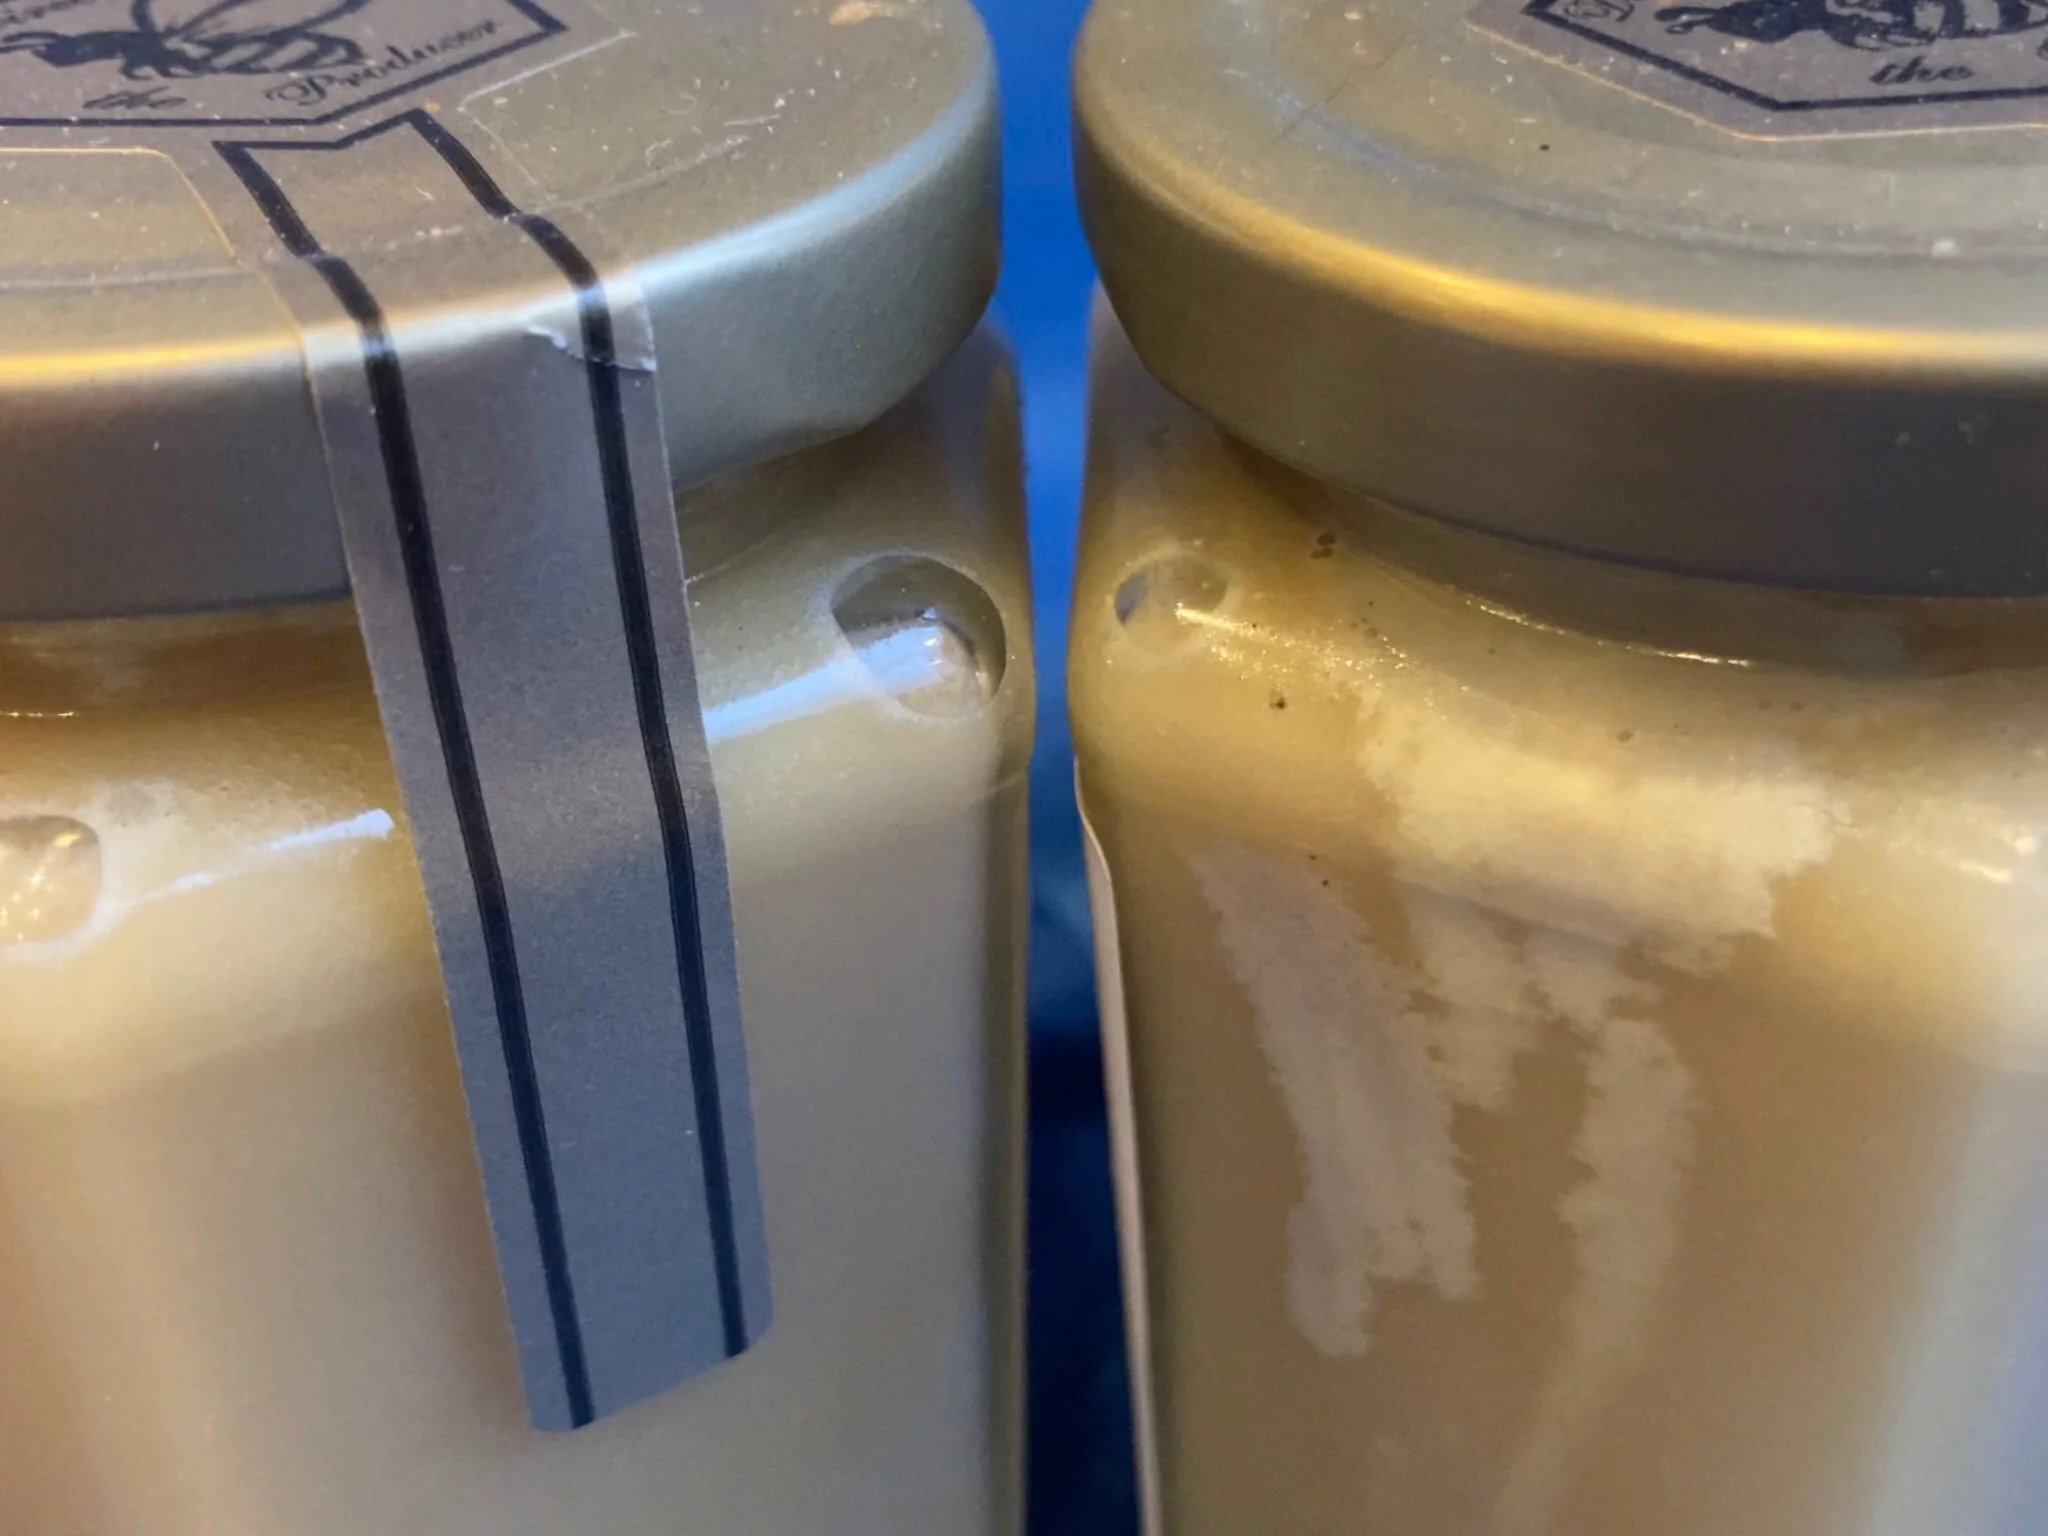
When bottling, do not re-use metal lids.
Return extracted combs for the bees to clean
To bring down honey from wet combs ( frames you have extracted), put them above a crown board or frame feeder. Leave a small hole, and the bees assume the honey is outside their home and so bring it down. If you leave this setup too long, which is usually after 36 - 48 hours, the bees start filling the frames with nectar; they have reclaimed the space as their own..


Be careful when draining wet combs that contain too much honey; they can make a puddle.
Once this has occurred, I assume, that if you wish to add more boxes of uncapped comb, close the entrance hole for several days. If necessary, to remove a little nectar from the frames, move them far away from your apiary and allow robber bees to suck them dry.
Cappings
Strain residual honey and wax cappings that are left after extraction. Next, seal them in plastic bags. Put the bags in a rapid feeder with the walkway open and make holes using a cocktail stick. This enables the bees to lick the cappings dry.
Types of Honey
Honey can be produced as “chunk” (a bit of comb floating in runny honey — it soon crystallises but looks nice) or “comb” — a lovely-looking bit of comb that the bees build in a frame. “Drained” = Section (a lump of comb cut out of a frame, left to drain and dumped in a container), “soft set” which is the correct term for “creamed” honey (runny honey seeded with 10% fine sugar crystals and then blended until it has the consistency of lemon curd or clotted cream). Baker’s honey is imperfect and only suitable for cooking.
Soft Set Honey is opaque, smooth, and viscous
Incorporating the starter

Kit for churning honey
Warm the starter (existing soft set honey) and uncrystalline honey so they are at 35 °C, and flow. If necessary, first melt any crystals by warming the honey to 50 °C and sieving it.
At 35 °C, add the starter in the ratio 10:90 and blend thoroughly.
Stir with a dedicated creamer attachment. Creamers look suitable for churning milk or drilling large holes. You need something beefy, like a masonry drill, to rotate the spindle. Be careful not to introduce bubbles.
Cool to less than 14 °C and stir twice daily until it becomes stiff. Finally, gently warm to 35ºC (keep it at less than 40 °C, so the crystals don’t melt) until it flows, and bottle.
I’ve produced a fine crystal honey without cooling as much in stage 4. I bottled it after stage 3 and placed the jars on my tiled kitchen floor. The honey did not become gloopy.
In depth information
Crystallised honey
Honey's crystallisation depends on its glucose/fructose balance. High-glucose honey sets rapidly with tiny crystals, whereas high-fructose honey does so more slowly but with large crystals. Temperature, water concentration, and contaminants are influential.
Good honey eventually sets solid in the comb. It is a sign of authentic honey. It is a normal process. However, it is a serious problem if you use wax foundation. There is no easy fix. The solid honey cannot be extracted. And worse, bees usually ignore it. If you can find an answer, bear in mind that crystals eventually melt and beeswax begins to soften at 40 °C. Wax melts at 62 °C. To comply with permitted HMF levels, do not sell honey that has been at 50 °C for more than 10 days (The Apiarist). The wonder-net says honey decomposes within 2 hours at 60 °C, and immediately at 70 °C.
Be of good cheer if you use plastic frames. Use a honey warming cupboard. The process goes something like this: Warm the frames to 50 °C for a couple of days. Allow them to cool completely so that the wax hardens. Extract as usual. Then thoroughly warm the honey to 50 °C to destroy any residual crystals; mix occasionally to make sure none linger at the bottom.
If you use wax foundation, feed the crystallised honey combs to your bees. This entails making it more palatable. Uncapping and submerging the frames in warm water is one suggestion. If possible, feed the damp frames to bees that are highly motivated, like a swarm.

Floor honey
I used an electric fan overnight to dehumidify some honey, and I should have used a thermostat.


Comb honey
All honey was produced as comb before frames became popular. Production requires a large workforce and an excellent honey flow.

Crystals on solid honey
Runny honey

High-glucose honey must be extracted soon (within a few weeks) after it is capped. The common sources are Dandelion, Oil Seed Rape (OSR) and Ivy. It must be transformed into soft set honey or mixed with a high fructose honey.
Commercially, honey is forced through filters and pasteurised so that it is slow to crystallise. Cheap “honey” can be made by adding sugar syrup or by spinning out nectar and concentrating it using heat. This “not honey” is bland and many people don’t know better. Apiarists in Britain would not dream of making this honey-like substance. Cheap honey, or that which is labelled from more than one country, is definitely diluted. Britain has lax rules concerning imports. One study tested honey sold by some UK supermarkets; 95% of the samples were adulterated.
When selling honey, it is worth advising customers about storage and what to do should it crystallise (see below).
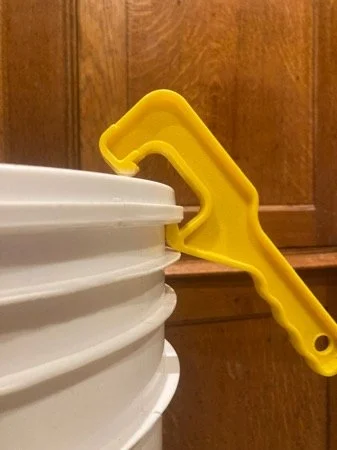
Since honey is hygroscopic, tanks must be full almost to the top and well sealed. Tough containers have a strong seal. It is so good that I find getting the lid on and off a battle. To remove the lid, there is a “curtain” that has to be peeled up. Once it has started coming up, you can use a unique tool. To put it on, angle the top about 20–30 degrees towards the joint opposite you. It is a matter of pushing it down in a small area, just like replacing a bicycle tyre. There is a knack to this.
The folk on YouTube demonstrate the technique. But it does not work for me. I got fed up wrestling with bears and threw all the lids away in contempt. I replaced them with screw-top Gamma lids. These are not completely airtight, so the edges need taping. Maybe the standard lids would be easier to remove after warming them in a hot bath. Small containers are easier.
If the honey contains too much water, it ferments. To ensure honey’s water content, use a type of hygrometer (a specialised refractometer) or work out its density. With care, this won’t be necessary if you used the shake method (described above).
Measuring honey density
Weigh a jar full of honey (H)
Weigh an empty jar (J)
Weigh full of water (W).
Density = H - J / (W - J)
Good honey should be over 1.45 kg/litre.
1.5 gallon tubs warm okay, albeit slowly; heat them at 50 ºC for 36 hours to melt all sugar crystals.
Storage

Frosting
If you are not careful and do not use warm jars, warm honey, and you have not sieved the honey well enough, or the honey cools too fast, tiny bubbles may form on the walls of the jars. This is called frosting. Initially, it looks like white swirls; it does not affect the taste.
A standard fridge fits Langstroth frames.
Thermostats
The DIGITEN DTC -102 is a Heating and Cooling thermostat. The cooling mode is redundant unless you want to make soft set honey. A thermostat like the DTC315 controls heating.
The instructions are poor. Disconnect the heater before set-up. The temperature vacillates between the heating start point temperature (Hsp) and Set Value (SV). PV is the ambient (probe) temperature. To program: hold down the Set button until the ºC / ºF flashes. Use the up, down buttons to set a value, and press the Set button to move to the next variable. HD is the temperature setting differential, the temperature between Hsp and SV. Hsp is automatically set when the SV and HD are inputted. When you’re done, complete the configuration by pressing the set button until all the items on the screen stop flashing.
Note: Changing the temperature unit ºF / ºC , deletes all settings. The temperature mainly hits Hsp, but using my accurate thermometer I once recorded a temperature of 1ºC above SV.
Honey warming cabinet
A tube heater is handy for warming. Purchase one that does not have a thermal cutout. I’ve used a 60W Thermotube tubular heater, and use a heat shield (not shown). It must be used with a thermostat. I have drilled a hole in the door of the fridge for a thermometer. A computer fan with a USB connection circulates warm air. Many people adapt Chest freezers.


How to Process old wax and cappings
Crystallisation and 5-(Hydroxymethyl)furfural (HMF)
Apart from soft set honey, honey eventually crystallises and goes hard. If it does so in the jar, the official advice is to be patient, stand the jar up to the level of the honey in water at 40 °C. Let the water cool for 30 minutes while stirring the honey now and again; repeat. I’m impatient and zap honey (for personal consumption) in my microwave at half power. I inspect and stir every 30 seconds. Heating over 50 °C for a short while is reputed to impact honey’s flavour. I haven’t noticed.
HMF is a measure of overheating or long storage. Massive overheating results in honey with a caramel taste. HMF is common in many foods, especially dried fruit. It can be massive in instant coffee: circa 2480 mg/kg. Your healthy porridge oats does well at 47.62 mg/kg. The permitted level of HMF in honey in the UK is 80 mg/kg. This varies in different countries.
HMF levels remain acceptable if the honey is warmed to 50 degrees C. for less than ten days. For more detail, read the Apiarist.
There are theories about HMF being good or bad for you. We’ll never really know.
Gifting and Selling
Then, the nice bit: sharing the honey with your nearest and dearest. The optimal temperature range for crystallisation is 11–14 degrees C, so to slow crystallisation advise your customers to store it in a warm cupboard 18-40 °C, or if they like viscous honey they could store it in an ultra-cold fridge, at less than 4 °C.

If you sell honey, the labels have specific requirements. Fortunately, labels sold by beekeeping equipment retailers will ensure you fulfil them. The picture on the label must represent the contents; for example, it must not depict a Bumblebee. A six-to-12-month “best before” date is reasonable, although three months is better for honey that's prone to crystallise.
Before selling honey, please read the honey regulations.
If you are considering starting beekeeping, you may want to know how much honey you will make. It depends on so many factors that it is impossible to say. Much more or far less than eight kilograms per colony. You’ll generally do better if you replace your queens every year.

Page BK 8.