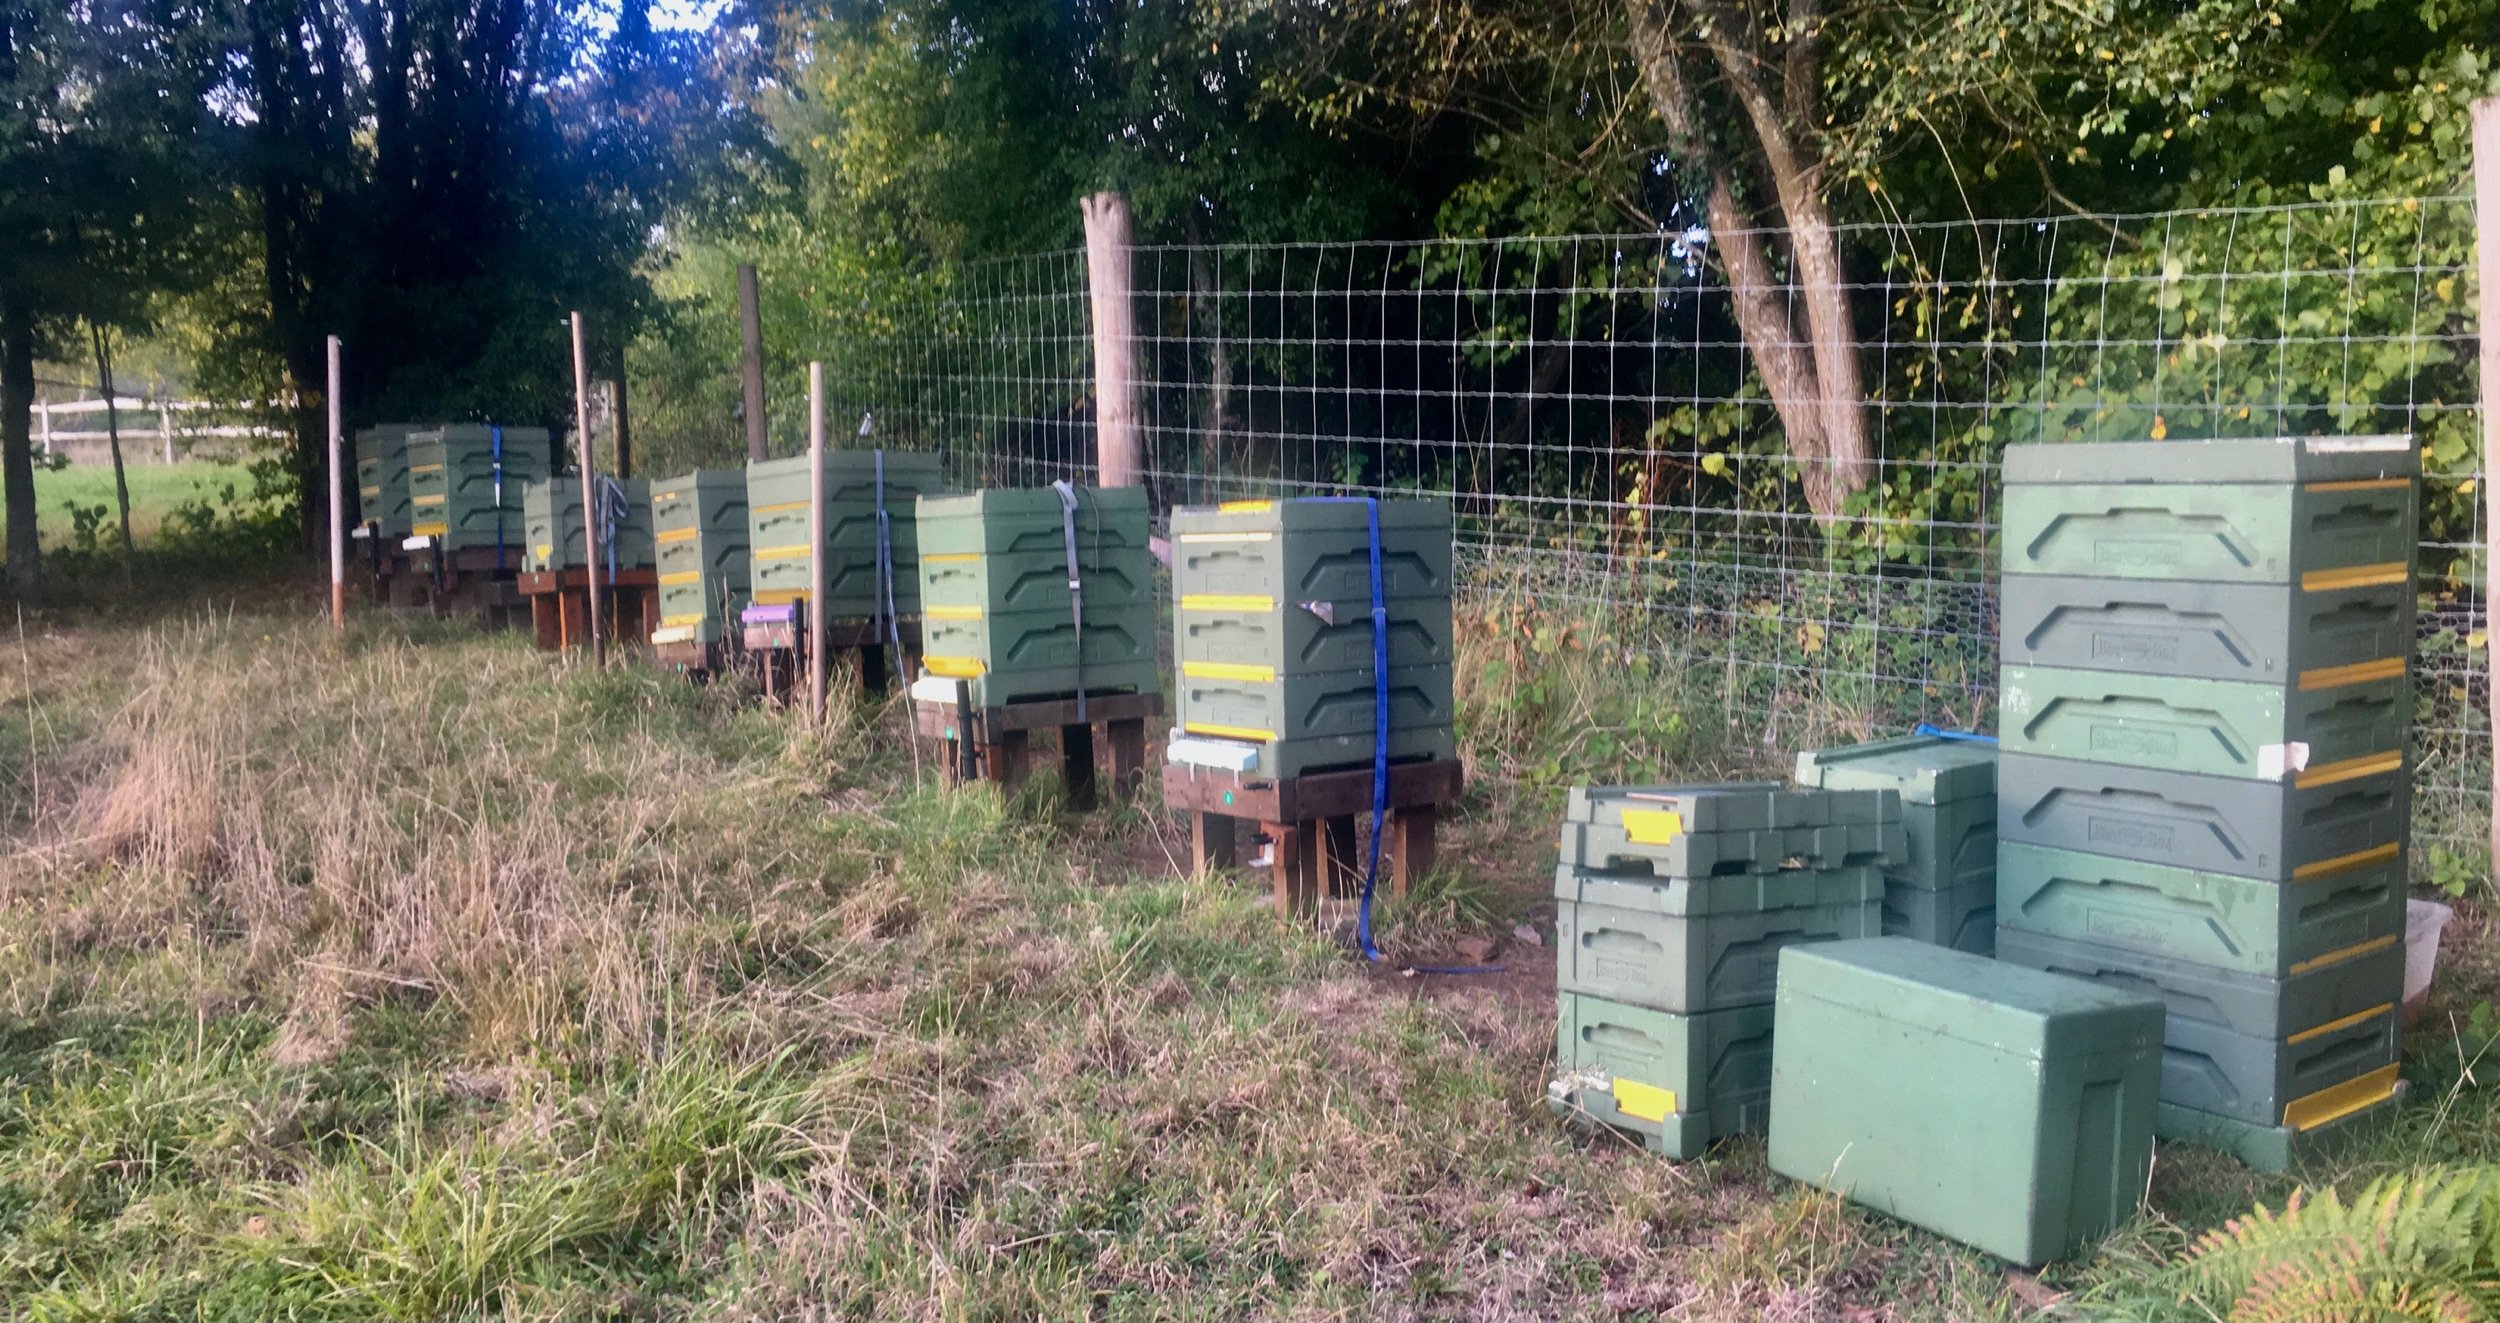
Inspecting colonies
Practical skills

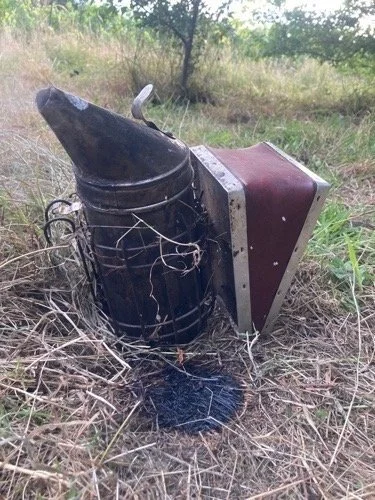
Smoker
Basic Assessment: Be aware of the reactions of honey bees to smoke; demonstrate lighting and use of the smoker.
Smoke briefly repels bees and also makes them gorge on honey, and this makes them calm. Making a steady supply of smoke requires an invention, and fortunately, someone has made one. Moses Quibley had this eureka moment and deserves a knighthood, but he was a Quaker and generously never patented his invention. The smoker’s crucial feature is a hole as large as the diameter of a finger in the lower part of the bellows and another opposite it in the firebox. When the bellows are compressed, a blast of air hits the hole in the smoker. As the bellows refill, they suck air from the surroundings. Demonstration of lighting a smoker.

The trick to lighting a smoker is working the bellows. Wait until the starter fuel is properly alight and then puff like mad. To start, light a match and immediately shelter it from any breeze by holding it just inside the burner, or use a gas hob lighter. Once alight, you may need to push the newspaper/starter fuel deeper down with a hive tool. It only takes a small amount of paper, a slightly squished strip so that you can see low down into the chamber. As you work the bellows, orange flames shoot out of the top. When the flames die down, this is the signal to add some primary fuel (see below), stop pumping and look to check that barely any unburnt fuel remains. Quickly throw in a handful of primary fuel, briefly puff and throw in another.
Work the bellows for a minute. By now, it should be producing a thick plume of smoke. Despite this, the fire is not established. Add another handful, puff and add the secondary fuel. Work the bellows every few minutes, after ten minutes it will be properly alight.
Once established, a wispy smoke plume should come out of the spout. If you find it difficult to light your smoker, try using hessian (burlap) or make a cylinder of rolled-up cardboard. Put the cardboard roll on the end of a J-shaped hive tool, hold it up, and blast it with a gas torch. Once alight, check that the smoke is cool by placing your hand in the plume.
The science of combustion
for the total non-scientist
When carbon reacts with oxygen, it forms carbon dioxide, releasing heat. The faster the reaction occurs, the quicker the heat is released and the hotter it gets. You can increase the rate of combustion, like a blacksmith, by adding extra oxygen and making the carbon readily available. So, with a smoker, work the bellows and use a starter with a large surface area like newspaper. The intense heat released from the starter fuel heats the grate and surrounding metal, just enough to light lumps of secondary fuel.
It is not the visible flames that light the smoker; The flames are a sign of combustion; and the colour of the flames largely depend on the fuel, the completeness of combustion, and temperature.
Fuels are not pure carbon, rather they are a mixture of organic substances. When these burn at low temperatures, they produce soot (smoke) and yellow flames; compare this with charcoal.
The maximum heat from the starter fuel occurs when it’s almost spent; the embers are scorching hot. This is time to add secondary fuel. Once alight, the burner restricts the amount of oxygen available (not too much or too little) so that the fuel heats up just about sufficiently to burn completely.
A smoker goes out if the fuel is slightly damp, or if it falls on its side when its body ceases to act like a chimney.
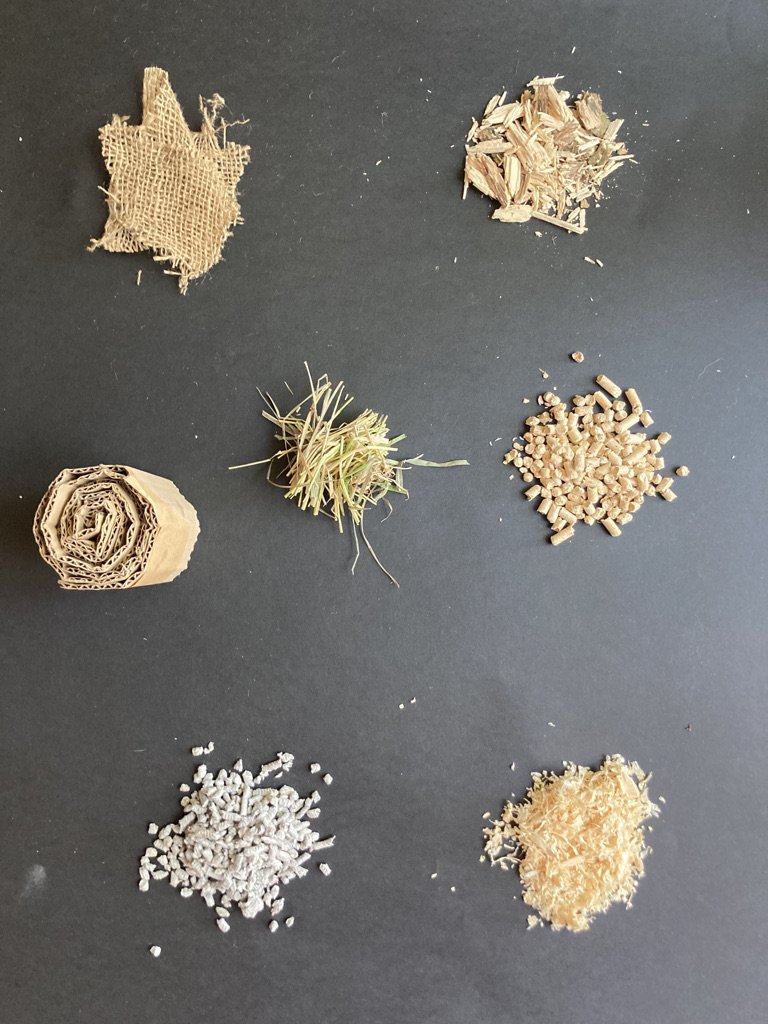
Fuels
Smokers
Starter / lighter: newspaper, shredded paper, writing paper, or hessian.
Primary: semi-dried grass cuttings, sawdust, cardboard, or smashed-up wood from dead branches.
Secondary: rodent litter/food pellets made from wood or compressed paper, twigs, or charcoal.
Packaging material: the packaging material from bee equipment sellers burns fast and hot.

Smoker with hinged lid

If the grate falls out use mesh instead.
If a smoker is left unattended it can start a fire.

Well lit.

Use a twirl of grass or a bunch of paper to stop sawdust flying out.

Sawdust and dead bees on the floor of a hive. Prevent this by putting a handful of grass on top of the fuel.

Charcoal after using wood pellets or twigs. It can be reused after being dried.

Litter pellets make a great secondary fuel.

Once the smoker is no longer needed, put it on its side and stuff the spout with grass.
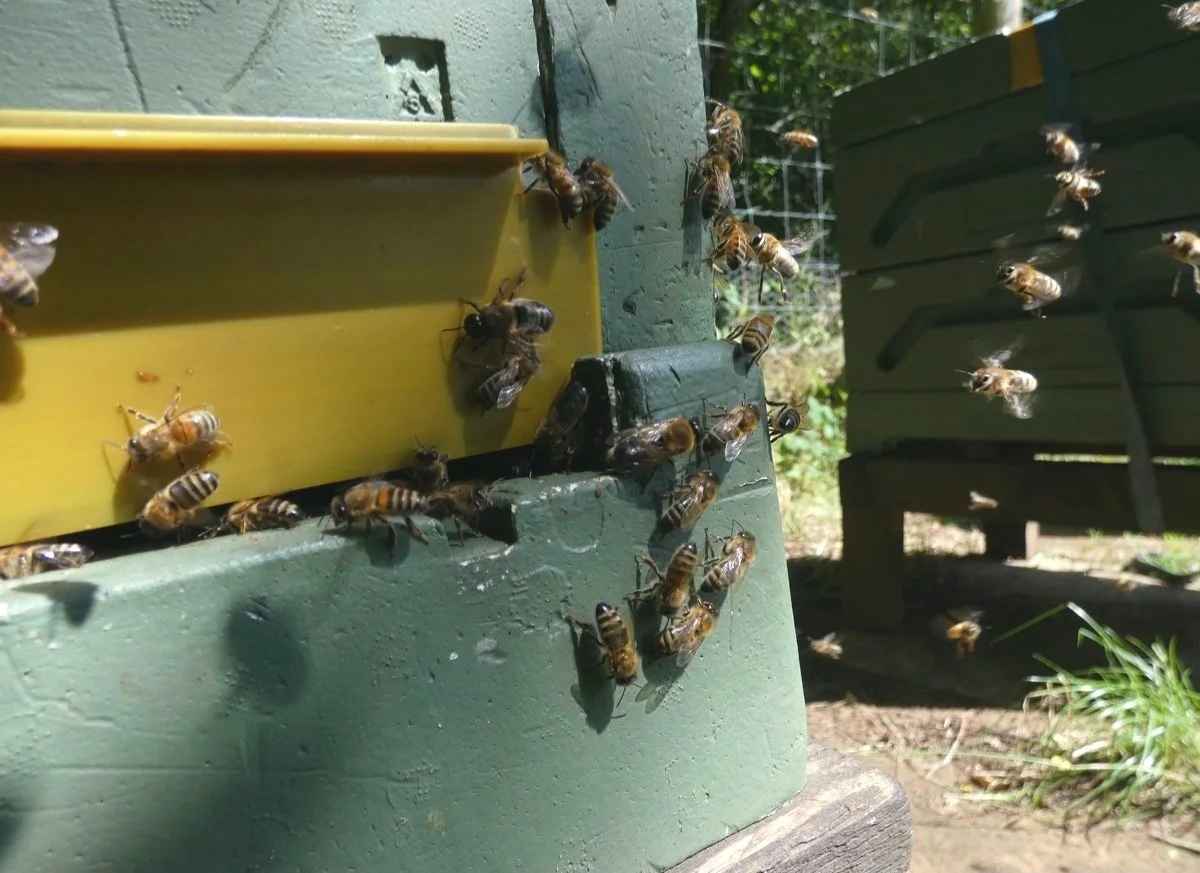
Start the inspection
I can’t teach you how to inspect a colony, but I can give you some tips. I recommend that you attend your local association practical sessions and watch some YouTube videos. Inspections underline your ability to tune in to your bees and anticipate their needs. Much information can be gleaned from what is happening before you open the hive. So much so that there has been a book about it: At the hive entrance by H Storch.
Before you smoke the hive, look and listen.
Bee flight pattern
Watch the way the returning foragers fly as they come in to land; they sometimes do a slight side-to-side adjustment even without a cross-wind. Their legs are angled backwards. Robbers do a more pronounced zigzag. Robber bees heavy with bounty, fly down rather than rise when they exit the hive. Try taking a video.
Fighting
Fighting on the landing board; the hapless intruder is harried by one or more guards, who pull, sting, and gnaw her. If there is frequent fighting, it suggests that bees are drifting.
Excitement
There is a lot of busyness with more bees on the landing board than usual and bees head to head, foragers unloading. There is a honey flow. If there is robbing going on, there is busyness and noise at the entrance of more than one hive (rarely one).
Normal activity
It is normal for beekeepers to spend a lot of time watching their honey bees.
Fanning
Fanning means using wings to shift air rather than fly. The bees adopt a characteristic bottoms-up position. Bees fanning in lines at the entrance do this in hot weather when curing nectar or cooling the hive.

Their fanning is incredibly effective at increasing air circulation. Bees fanning here and there at the entrance are probably spreading the Nasonov pheromone, which is a “come here message”. Maybe you have just caused consternation by throwing bees off their frames, done a split or the queen is lost. They may be assisting foragers to get home.
Pollen
Observe the colour of the pollen they bring. This may give you an indication of which flowers they are visiting. At the end of the year, you might like to submit some honey to the National Honey Monitoring Scheme to learn what plants your bees have foraged.
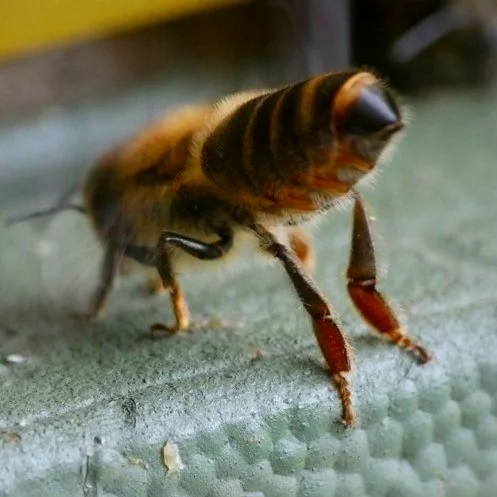
If many incoming bees have the corbiculae (pollen baskets) on their legs puffy with pollen, it signifies that the queen is laying, and the colony is feeding open brood.

Bringing in hazel pollen in early February
Each larva requires 135 mg of pollen. However, the protein value of pollen varies from 8 to 40%. The bees are unable to determine its quality, so they increase their foraging in response to a shortage. Over a year, a colony consumes a staggering 15 to 30 kg. The most distinctive colours are:
Dandelions — orange
Sweet chestnut — red
Himalayan balsam — grey
Siberian Squill — blue
Ivy — white / pale yellow
Lost queen: Bees wander around the entrance and outside the hive looking for their queen. This happens within 15 minutes of the queen’s absence. On the frames it is only visible when the frames are not crowded. When it happens, and I’m not sure if it always does, this wandering response is a handy way of determining which brood box contains the queen. I call this action Queenless Movement Behaviour (QMB)
Foragers returning in the evening.
Noise
Colonies make a lot of noise, which are challenging to interpret. Before a swarm, some bees run on the comb. Because of this, some beekeepers claim to be able to anticipate when a colony is about to swarm. Queenless hives are sometimes noisy and roaring. Orientation flights (photo) are loud.
A tinkling or whirring noise suggests they are fanning.

Thumping
It's not precisely an inspection, but If you thump the side of a hive in the winter, and you hear a buzz, some bees are alive. Place your ear hard against the hive wall, or use a stethoscope, as the buzz may be quiet.
Orientation flights
Bees noisily bob up and down, and fly facing the hive. Each bee flies vertically with a slight horizontal component, usually as part of a group. They are noisy and enthusiastic. The short-lived flights end abruptly, but busy hives may have longer dances. Foragers may join in as they find their way through the cloud.
Piping
Noises made by virgin queens are of two types when analysed. They are composed of tooting and quacking noises, and are collectively called piping. Further details:
More information about piping – research
Quiet hive
Maybe there is a colony with only occasional bees coming in or out when other hives are busy. If it had been okay last week, it is probably having a bit of downtime. It is most unlikely to have collapsed, and this is not a sign that they have swarmed. Every colony does things differently; they have a character.
Under the hive
Look under the hives; is there a pile of dead bees? Are they minus their thorax, so is it a pile of heads and abdomens? This is probably due to a shrew or maybe a mouse. They predate live bees during the winter. Even if the bees don’t get eaten, repeated disturbance of the cluster could exhaust the colony.
Look below the landing board. See if any dead or dying bees are on their backs, buzzing like dying blue bottles. This suggests they may have been poisoned. If so, you deserve compensation from the farmer.

Bees that absconded
This picture shows some workers and the Q after they absconded after a shook swarm (the entrance reducer had flopped forward). The queen was clipped, so they failed to get far.
I found them as a brown puddle among the grass four days later. When I put a nuc beside them, some clambered in and fanned at the entrance, disseminating the Nasonov pheromone.
The Q is out of focus in the right foreground, clinging to grass. She seemed okay, and I returned her to her hive. I forgot I had put a frame of eggs in to mop up varroa. So sadly, they killed their old queen, dumbo(s).
Look inside the hive
Basic Assessment - The care needed when handling a colony of honey bees and the reactions of honey bees to smoke;
Puff some smoke through the entrance and through the hive floor. Wait two minutes for it to take effect.
Remove the roof
Peep through the translucent inner cover (if your hive has one).
Some beekeepers worry that the bees get squashed under the cover. Yes, in a Beebox they can. The only sure way to prevent this is to scrape all the wax off the frames at the end of every inspection. If you don’t do this, the roof does not fit properly. It is a design fault. White wax under the cover/crown board does not signify that they are out of space, but it might in other hives.

The view through the cover shows plenty of bees and a blue paperclip supporting an Amitraz strip.
Peel off the inner cover/lever off the crown board
Place the cover on the roof down behind the hive. Usually, bees stay on the combs, but some may spill onto the walls once disturbed. Ease the boxes apart. Wiggling your hive tool from side to side can help.
If many bees scramble, smoke in the gap, and listen as they are driven back. Too much smoke to the supers can taint honey.
The disruption to normal colony function caused by an inspection takes hours to subside. The effect of a puff of smoke reduces stings for 20 minutes, and it takes at least two hours before they rid themselves of the effect of having a honey stomach full of honey. It must cause them a lot of work to warm up.
Once the edges are open a crack, check for stuck-up frames by running a hive tool along the gap. This is only possible with Paradise honey hives, not other poly hives. This is because Paradise hives have plastic edges that slopes down slightly (from the inside to the outer edge) with a 6 mm lip. Other hives have a deeper L-shaped lip, so this technique is impossible. To free frames that are stuck, wiggle your tool to free them.
Alternatively, make a 10 mm gap to see the problem frames and push them down.
After this, I shove the handle of my bee brush in to the crack. This prevents the bees from getting squashed when I open the other side of the box. The burr comb can often be broken by twisting the top box over the lower one. But the bees disapprove.

Without the inner cover, the underside of the Beebox roof becomes covered with burr comb.
Once a super is free, put it behind (if possible placed diagonally on the roof) to the side of the hive, but not on the ground.
Place the upper brood box on the supers separated by the QE or preferably a spare roof. If there are QC on the bottom bar of the top box, they may be squashed on the QE. Unless you are careful, the Q could get lost.
Do not inspect one brood box on top of the other; the Q may play hide and seek. Additionally, theoretically, you may smoke angry bees down to the bottom box, where they will hold a reception party for you.

It is easy to assume bees react rather than think. But for example, how do they create three queen cells in the case of supercedure? How come only three or fewer soldier bees from an unruly colony decide to follow you when you leave an apiary rather than a cloud? Bumblebees have been seen to “play” with a ball after completing an experiment. Whilst bees have a tiny brain in their head, they have many of their automated body functions controlled by a string of mini-brains called ganglia which are placed in each body segment.

It does not matter which brood box - top or bottom you inspect first. But QCs are more likely to be in the top box. If you are right-handed, free up and hook up the first frame (or the dummy board) at its left limit. Put the first frame safely in a sealed box like a nuc; otherwise, lean it against the front of the hive.
Whenever you see a line of beady eyes in the cracks between the frame you wish to remove, gently smoke them down.

Basic Assessment: the reasons for opening a colony
Be purposeful. What are you looking for? It may just be eggs, to check for queen cells, progess or presence of stores. As you inspect stay aware of how the bees are reacting.
Don't tilt frames with a starter strip or unwired wax foundation when inspecting them. A special technique is necessary to prevent the comb from falling apart. Move the long edge into the vertical and swizzle it around 180 degrees, swap hands, and lift it up so that the long edge is horizontal.
It helps to have the sun behind or above you. I consider this essential if you want to see eggs. I met a beekeeper whose apiary was beside a hill, and he could only do inspections before 2 p.m.
Inspect each frame in a measured way by shifting your focus systematically back and forth, like when looking for something lost in the grass. Our brains are only capable of assimilating data at a certain rate. Faster than that, and it obligingly confabulates to fill in the gaps so you don’t know what you’re missing. But if you move your eyes too slowly, the queen will move out of view to a segment you have already inspected. Our central area of detailed vision is no larger than your thumbnail when you hold your hand at arm’s length. Our eyes constantly dance around, so we don’t notice. But it explains why one sees the queen one moment, and then she’s gone.
Be cautious about following advice.
Mature beekeepers may have forgotten what it was like not knowing very much. They tend to find a way of doing something, and because it works, they assume it is the right way. For example:
Wash your bee suit between inspections so it does not retain alarm pheromones (commendable hygiene).
At the start of your inspection, find the queen, put her safely in a cage, and store her in a breast pocket. If done on a hot, sunny day, the queen will expire.
A jam jar wasp pot should have three additional small holes drilled in the lid, or the bait should contain alcohol or … for maximal effect.
Using sugar solution in wasp traps. This works well, but plenty of people will tell you it attracts bees..
Make thymol solution using distilled rather than tap water.
“No particular preparation is required (for making a two queen system) … just feed 2.25 litres of thick syrup in the second half of March and again three weeks later. If the starting point is an existing colony on one and a half brood chambers, then it is best to slip in a queen excluder between two boxes on a mild day towards March. First smoking them down should there be any brood in the shallow box. If this shallow box contains more than six frames solid with overwintered food, remove the excess and replace it with empty drawn combs centrally placed before feeding; the objective is to have a reservoir of liquid food when bees often need to forage for water on cold days.” Ron Brown: Beekeeping a seasonal guide, page 59. — Too complicated and does it matter!
Shaking bees off brood frames
Basic Assessment: Demonstrate how to shake the bees off the comb and look for brood diseases.
When on the hunt for queen cells, even small puddles of bees can hide them, so shake the bees off. This stresses the bees, so most people compromise.
There are various techniques for doing a shake:
For starters, Hold the frame obliquely (the hypotenuse) over the box's surface. Shake it with a down movement and a sudden stop.
Remove three frames to make space. Lower a frame until it is 2 inches off the floorboard, then give it a good thump with your fist (not in an exam).
Do a shake using a box (eke) as a funnel. (Spray the upper inner walls with water).
If you are clever, shake the frame inside the brood box.
If you inspect a hive situated in the shade, it is impossible to see young unsealed brood. So you’ll want to carry frames to some sunshine. There is a natural tendency to pick up a frame semi-covered with bees and do this. This works fine unless you get stung and drop the frame, and lose the queen.
YouTube videos are instructive, and this video shows some things to avoid
The first frame shows drone brood in worker cells - not normal (but not infrequent; observe).
The bees shake their bodies and run around on the combs - an undesirable trait.
He rolled the bees by removing the second frame and pushing it in again before making a working space.
No dummy board; that’s okay; not everyone uses them.
A bee that has emerged does not go straight to nursery duties.
It way have been too early to add a super of undrawn comb because the colony was barely larger than a nuc and theoretically it means that they may need to do more work keeping the brood nest warm. However, adding a super early is sensible as it enables them to put stores above the brood nest rather than block sideways expansion.
They had plenty of comb to draw. There are various rules of thumb regarding when to super or add a second brood box, like super when a box is mostly full of bees. Add a second brood box when the first is more than 3//4 full of bees. Add two supers at the beginning of a flow. everything takes longer with undrawn frames. People choose their criteria.
The laying pattern was okay on one frame but rather spotty elsewhere.
The bees stayed between the frames, which was nice.
He missed a great opportunity to mark the queen - whilst the colony is small, not everyone marks their Q.
He was using plastic foundation for brood and wax foundation in the supers. Usually, if people choose to use a combination, they do it the other way around, as plastic does not blow out when the honey is extracted.

As you progress with your inspection, you will come across a frame containing a lot of pollen. The queen is usually to be found somewhere beyond this in the brood nest.
In a poly hive, the Q is not infrequently on the second outermost frame, occasionally on the first, despite no brood nearby. The queen will seldom be on a frame of nectar. When workers form groups guzzling honey, she will not be among them.

A frame in September, there is a ring of pollen around the brood with an arch of stores above.
When you see eggs, the likelihood is that the queen is close. But if you’ve used a generous amount of smoke, she could be anywhere.

Each plant’s pollen is distinctive in colour and shape.
Check how the bees are reacting. The situation in the photo is okay but they are displaying signs that they are unsettled. Three guards are assuming an intimidating stance as they line the edge of the frames. Other bees are bumbling around.
Eggs: When you see eggs, the likelihood is that the queen is close. You need good eyesight to see the orientation of an egg. Eggs lean at an angle on day two and are horizontal on day three. But just be content to see eggs! As you work through the box, see if the queen has space to lay. A reasonably prolific queen requires a second brood box when there are seven frames of brood or plenty of bees.
Adding a second brood box.
According to Wally Shaw, add the second brood box under the first (but only if it contains frames of drawn comb). However, normal practice is to place it above. To get combs drawn, definitely put it above. Bees in poly hives expand so rapidly in the spring that they always need two boxes. Some wooden hive users keep their colonies on one brood box.

Your viewpoint must be taken into account when attempting to date eggs.
Limited inspections
When learning a skilled task, it helps to break it down into its constituent parts. If you start with a nuc you won’t have too much to look at, but it can feel daunting when it grows into a large colony. So, if you feel overwhelmed, I recommend you check these variables:
1. Are eggs present? (Young queens occasionally lay two eggs in a cell. This is normal). During a routine inspection, seeing young larvae rather than eggs is sufficient.
2. Are there eggs in queen cups, or are there QC? Mark any frame that contains a QC with a drawing pin or a paint mark, and record the age of the QC.
3. Have they got some stores? At least one good frame to last a decent colony one week.
4. Has the queen got space to lay? There should always be a couple of drawn frames, except when a lot of nectar is coming in.
5. Does the sealed brood look healthy?
That’s it, you’re done.
To begin with, concentrate on these until your excitement settles. You may note other things in passing, but focus.
Closing a poly hive without squashing bees: It can be done:

A bee inspecting a Geranium rozanne (an amazingly floriferous plant that is unpalatable to slugs).
Detailed inspections
Once you get quicker at inspections, look in more detail:
Assess the amount of nectar being processed; It is a partially invisible process. To turn nectar into honey, bees blow it into a bubble between their mandibles, using the breeze in the hive to reduce its moisture level. After this, it is processed in the comb, where it takes 1 to 5 days to reduce the water content to 20%.
Brood nest: check whether it is being backfilled with stores and hence reducing the queen’s space to lay. Replace stores with drawn comb, maybe add a second brood box. Under-super so there is room above the brood nest. A queen excluder can sometimes act as a block.

To assess whether the colony is contracting or expanding, count the number of frames of brood. A frame with any brood on it counts. If you are clever, appraise the ratio between the number of frames with unsealed brood relative to sealed brood to gain a sense of whether the colony is expanding or contracting.
The brood pattern can be one of three types: carpet laying — a whole frame in one go, concentric laying and spotty. When there are two brood boxes, a clever Q sometimes lays as if the gap between the boxes does not exist. A spotty brood pattern has many causes including disease.
As you go, routinely look out for the queen. It is rarely necessary to find her.
The queen is your last priority, it is not needed and will greatly extend your inspection. It is not kind to chill your bees.
A young queen is almost impossible to see as she moves fast. Such a queen is called a “runner”.
Once you see eggs, you know that the queen was alive three days ago. The photo shows six frames of brood. The brood pattern isn't too bad, but is extremely spotty in places.

Grumpy bees
When the hive is opened, the best colonies continue their business. The queen ambles along, laying eggs, and the bees wander around on the comb nonchalantly. They require no or little smoke.
Some bees are defensive as soon as their hive is opened. If they did not fly out at you when you opened the hive a crack, the first sign of grumpiness is that the background noise in the hive changes; If you move your hand too rapidly across the top of the frames, tetchy bees fly up. Unsettled bees line up in the spaces between the frames, showing off their intimidating beady eyes. A sizable colony almost immediately throws a couple of bees into orbit around your head. A sting due to poor handling is insignificant, but if a bee stings without provocation, the colony doesn’t like you. Each sign on its own is not worrying, but in combination, they are. However, with judicious smoking and a deft touch, you can stay in control.

Intimidating bees line the spaces between the frames.
If the bees completely line the frames, they are spooked. Settle them down with a little smoke; it is reasonable to continue your inspection if necessary, but be prepared to be stung. Do the essential things. If you’ve been inspecting them for a long time, stop and avoid doing anything that will wait until tomorrow.
If you bravely carry on, maybe because their temperament is always unkind, or you must find the queen, a bee may start buzzing around your visor, trying to force it’s way into your suit. When bees run around on the combs, there is no hope of finding the queen. If you seek the queen for swarm control purposes, come back tomorrow, meanwhile put a QE on top of the floor if you are worried.
Upset bees are more likely to be scared at the next inspection, especially if you have killed a lot of them. If they are always over-defensive, remedy any contributing factors and re-queen.
Robbing
Later in the year, bees begin robbing within a few minutes of opening a hive. It is tedious and means you can only inspect one hive per visit to your apiary. The necessity for routine inspects falls off in July, particularly if you have done a manipulation earlier in the season. When they rob, they go wild over every drop of honey. If you are doing a quick inspection, every second counts. One solution is to spray any dribbles with weak bleach solution; it will temporally make them unattractive. Much more about robbing:
Inspections in poor weather

Defer the inspection
The cut-off for a full inspection is around 14 deg., So long as the bees are flying.
If the weather is unfavourable, e.g., 12 deg.C, and the bees are still flying, do a partial inspection in just a minute or two. Wind and sunshine should be considered. A sheltered south-facing site pays dividends. If there is only one brood box that is not congested, and your strain of bees isn’t prone to swarming and is not very prolific, the risk may be low, but you can never tell with bees.

It is rarely necessary to inspect a colony in poor weather. If you must, put the varroa board in for 1–2 days, and the crud on the board will show the site of the brood nest. During the winter, when the varroa board is in position, bees in Paradise hives cluster at the front of the hive.
Open the hive and if they object use plenty of smoke. Otherwise, look over the top of the brood box to see if more bees are evident over three or so frames. Lift a few frames and check for queen cups (pc). If none, terrific; they should be okay for a week. But if you see queen cells, Oops, that's a problem. Activate the Swarm trap.
If there are two brood boxes, and you have an assistant, in poor weather, inspect under the top box
Do it like this, taking less than one minute. Lift the hive edge nearest you as if it is hinged on the other side. Smoke some, and using a torch, look to see if there are any QC on the lower edges of the frames in the top box.
If you find QC, you could sort the problem by using any board that has a QE and an upper entrance.
If you are laissez-faire or anxious, I suppose you could put them on hold with a manipulation board without inspecting them. Whatever your approach, inspect the colony the moment the weather improves.
Drawing comb and supering
Feral bees draw comb in three situations: swarming, if their nest is damaged, or they need more space.
If you can emulate these conditions, they will be eager beavers; otherwise, they do diddly squat, particularly with plastic frames. Creating wax requires warmth and energy, so a good honey flow or sugar feed and sufficient bees are preconditions. Fourteen to eighteen-day-old bees are good at producing wax. Maximal warmth is above the cluster in all vertical hives (and at the top of poly hives).
The quickest method is using their swarming urge, whether natural or simulated: Shook swarms, and Taranov manipulations seem drastic, but they emulate a natural process. More information about these techniques.
Repair mode is less straightforward (for us). Natural reasons might be when a bear or wax moth damages the comb, or a branch falls off and exposes their nest.
Always tempt them by giving them a starting point—a drawn comb or preferably open brood. This means putting frames in the area to be drawn, e.g., in the middle of a box of undrawn frames or above the brood nest.
Give them a ready-to-go surface: fresh wax foundation, starter strips or well-waxed plastic frames.
Do not provide an obstruction — no queen excluder.
The correct timing. If a large nectar flow grabs their attention, they prioritise storing it in their existing comb. It is touted that it is only when all the comb is occupied with honey and nectar do they notice a problem. But they love drawing comb on wax foundation, so there isn’t a issue 😊. If they are in the main flow, they are unlikely to swarm; let them get on with it. It is possible to stimulate a flow in the spring by giving them a sugar solution. But if the colony becomes cramped, it may cause them to swarm. For example, my colonies have 10 to 12 frames of brood by the first week of April and are planning to swarm. This not the time to feed them! When you do feed, do it in the build up stage when there isn’t a flow. Be careful they do not store sugar rather than nectar.
They should continue drawing comb once they recognise a “hole”, a significant hole. Frames without foundation provide this impetus.
Avoid using colonies that are ill or out of sorts e.g., high varroa count
Use large colonies
Avoid hot or cold weather when the bees are preoccupied with controlling the hive milieux. Warm weather helps.
Some people spray plastic frames with a sugar solution. I’m dubious whether it makes a difference.
Undrawn frames are filled if they get in the way of the bees. Placing them in the centre of the brood nest is usually frowned upon as it “splits the brood”. This is a problem when the bees are using one brood box and are not numerous. But if the brood boxes are oozing bees, interweaving frames of foundation or frames without foundation between brood frames is not an issue.
Some manipulations are very effective for drawing comb: Detailed information
Adding boxes and supering
When to add a second brood box? It depends on how prolific your bees are. Colonies headed by a young queen do things faster, and colonies in poly gives expand rapidly. A swarmed or manipulated colony may just need one. The rest of the time, bees on medium poly hive boxes mostly require two. I don’t know about wooden hives.
Supering. They need to know that there is plenty of space up there. A small colony that has swarmed will only need one box. Large colonies require a box that they are moving into.
Don’t inspect unless it’s necessary
Every time the hive is opened, the bees get chilled, their stomach fills with honey when they don’t need it. Smoke disrupts their navigation inside the hive, their defence force is alerted, and they may be sprinkled with water. The normal hive function must take hours to return to normal. They are stressed and produce less honey. However, if you do not regularly, and you have sticky bees, that produce a lot of propolis, remove brace or burr comb your next inspection could be very sticky,
A preventive manipulation dramatically reduces the necessary inspections, since swarming is unlikely for a few weeks, maybe longer.
Many people cease inspections in July.
Don’t cause a fire
A smoker rapidly goes out when lain on its side. Plug the spout to be sure; fresh grass works well.
You may be interested in Tips on keeping hive records
Next: swarming
Page BK 3.
